| Importing Clients' Information |
|
Before importing your clients into Client Track, you must export your clients' information
first from one of the software packages listed on the left side of the menu. |
|
| Follow the instructions below on how to export your clients' information into a text/CSV file. |
|
|
|
| DT Max T1 I DT Max T2 |
|
|
|
| Exporting Clients From DT Max T1 |
|
| STEP 1 |
|
 |
|
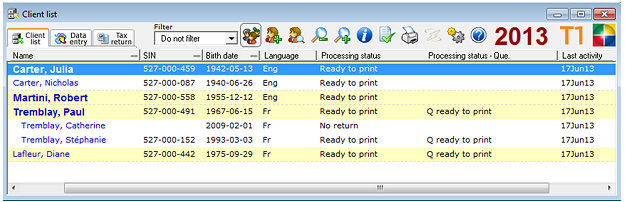
| 1) Open up DT Max T1 and click the tab to view all of your clients. |
|
2) To select specific clients, click on a client and hold down on your keyboard and click the
next client. A yellow bar will appear to let you know that client has been 'marked'. |
|
| Note: To select ALL clients to export, go to Step 2 below. |
|
| STEP 2 |
|
 |
|
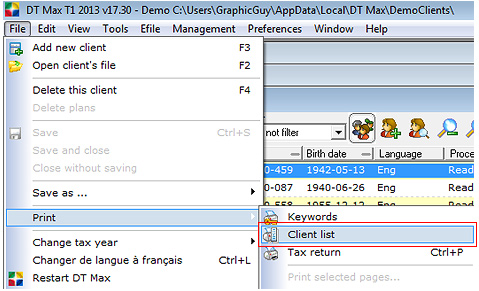
| From the main menu in DT Max T1, go to File > Print > . |
|
| STEP 3 |
|
 |
|
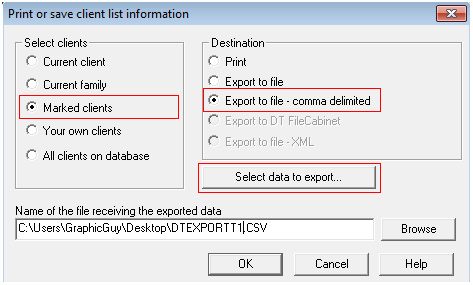
1) If specific clients were selected from Step 1, will be automatically selected as
shown above. If not, select . |
|
| 2) Under 'Destination', select . |
|
| 3) Name the exported file (optional) and click to find location to save export file to. |
|
| 4) Click . |
|
 |
|
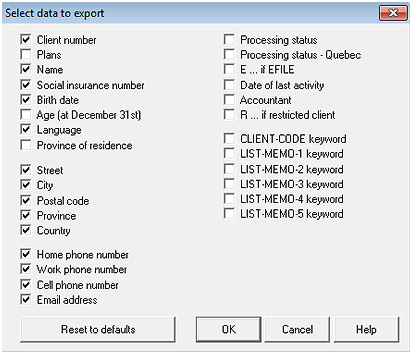
| 4) Check off all of the data fields shown above to export and click . |
|
| 5) Click to complete export process. |
|
| STEP 4 |
|
 |
|
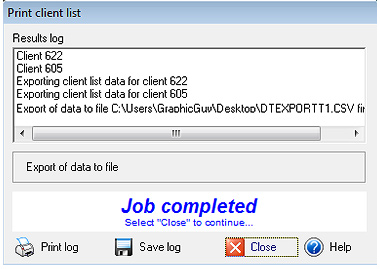
| After file has been exported, click . |
|
| STEP 5 |
|
 |
|
| 1) Open up Client Track. |
|
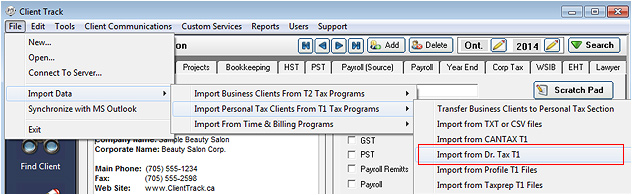
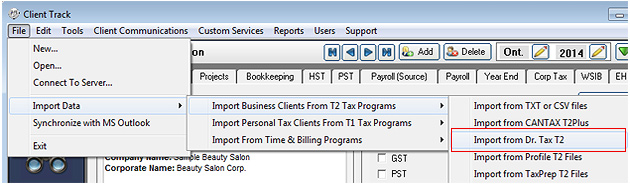
| 2) From the main menu, go to Import Data > ...T1 Tax Programs > |
|
| STEP 6 |
|
 |
|
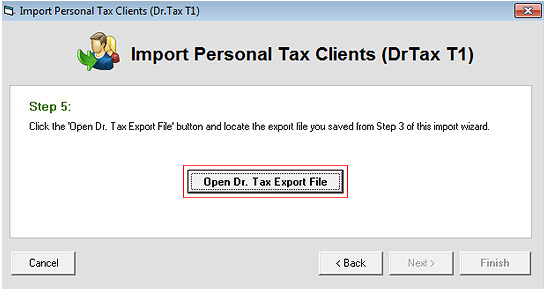
| 1) In the Import Wizard, keep clicking to reach to Step 5 as shown above. |
|
| 2) Click . |
|
 |
|
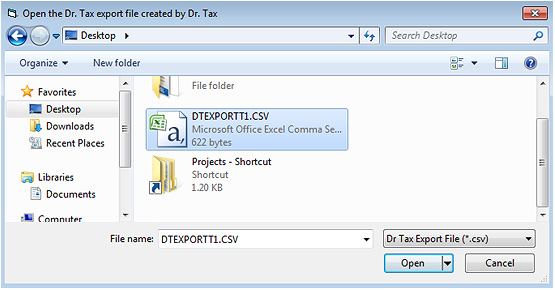
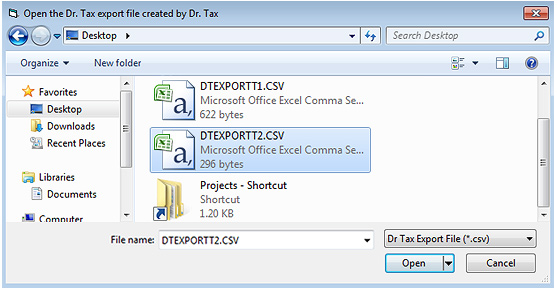
| 3) Find the export file from Step 4 and click . |
|
| 4) Click to complete importing T1 file into Client Track. |
|
| Exporting Clients From DT Max T2 |
|
| STEP 1 |
|
 |
|
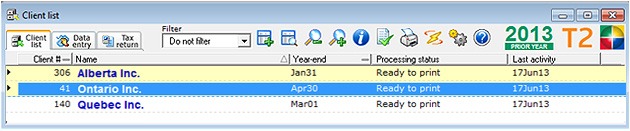
| 1) Open up DT Max T2 and click the tab to view all of your clients. |
|
2) To select specific clients, click on a client and hold down on your keyboard and click the
next client. A yellow bar will appear to let you know that client has been 'marked'. |
|
| Note: To select ALL clients to export, go to Step 2 below. |
|
| STEP 2 |
|
 |
|
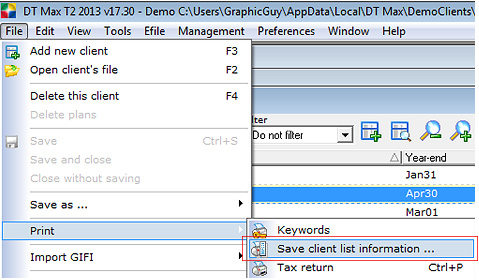
| From the main menu in DT Max T2, go to File > Print > . |
|
| STEP 3 |
|
 |
|
1) If specific clients were selected from Step 1, will be automatically selected as
shown above. If not, select . |
|
| 2) Under 'Destination', select . |
|
| 3) Name the exported file (optional) and click to find location to save export file to. |
|
| 4) Click . |
|
 |
|
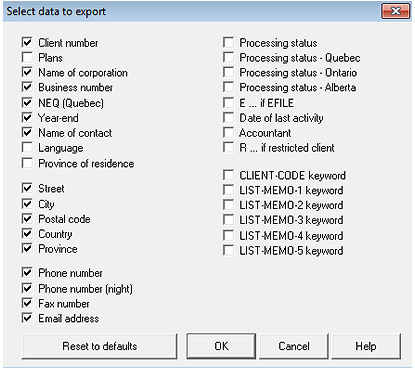
| 4) Check off all of the data fields shown above to export and click . |
|
| 5) Click to complete export process. |
|
| STEP 4 |
|
 |
|
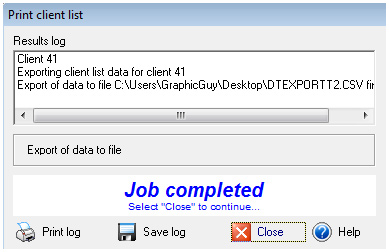
| After file has been exported, click . |
|
| STEP 5 |
|
 |
|
| 1) Open up Client Track. |
|
| 2) From the main menu, go to Import Data > ...T2 Tax Programs > |
|
| STEP 6 |
|
 |
|
| 1) In the Import Wizard, keep clicking to reach to Step 5 as shown above. |
|
| 2) Click . |
|
 |
|
| 3) Find the export file from Step 4 and click . |
|
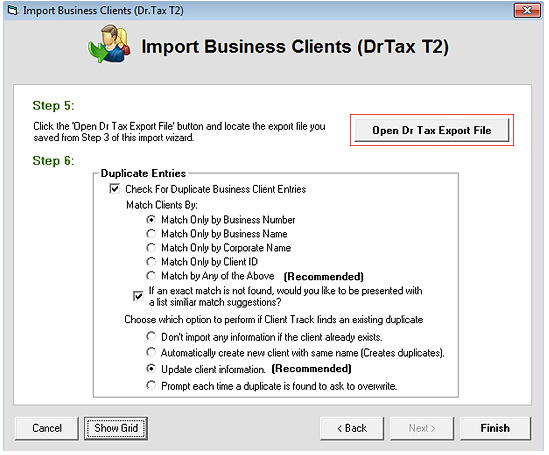
4) To avoid duplicate fields, check off and select
type of duplicate search. |
|
| 5) Click to complete importing T2 file into Client Track. |
|