| Importing Clients' Information |
|
Before importing your clients into Client Track, you must export your clients' information
first from one of the software packages listed on the left side of the menu. |
|
| Follow the instructions below on how to export your clients' information into a text/CSV file. |
|
|
|
| CANTAX T1 I CANTAX T2 |
|
|
|
| Exporting Clients From CANTAX T1 |
|
| STEP 1 |
|
 |
|
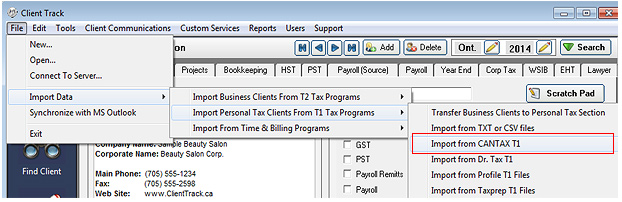
| From the main menu in Client Track, go to Import Data > ...From T1 Tax> . |
|
| STEP 2 |
|
 |
|
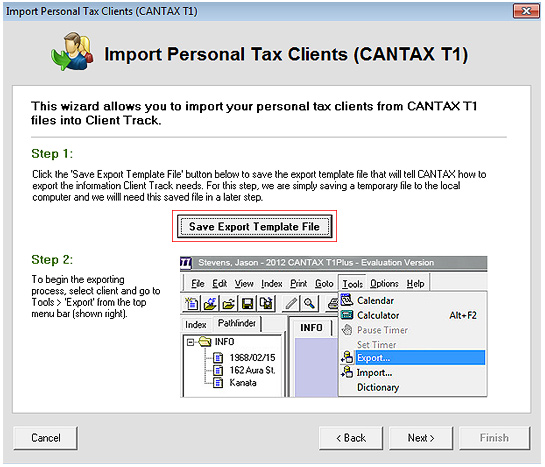
| 1) Click . |
|
 |
|
| 2) Select destination to save .tpl file to on your computer and click . |
|
| STEP 3 |
|
 |
|
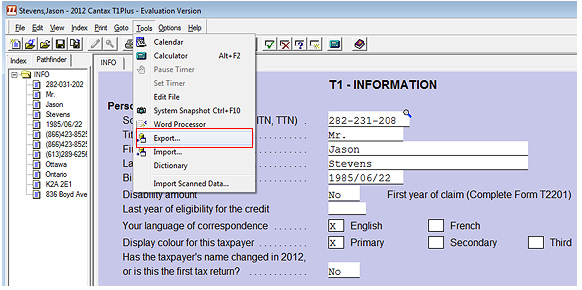
| Open up CANTAX T1 and click from the main menu. |
|
| STEP 4 |
|
 |
|
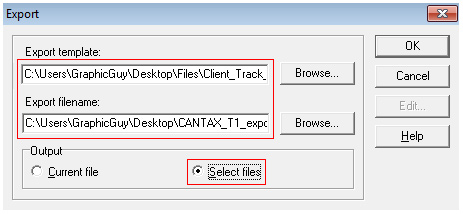
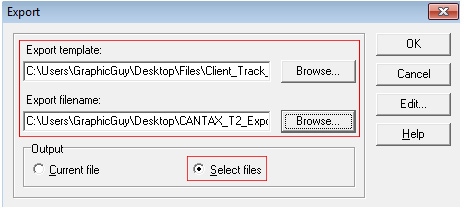
| 1) For 'Export template', click and find the saved .tpl file from Step 2 above. |
|
2) For 'Export filename', click . Select the destination to save file to and insert name of
export file and click . |
|
| 3) Under 'Output', check off . |
|
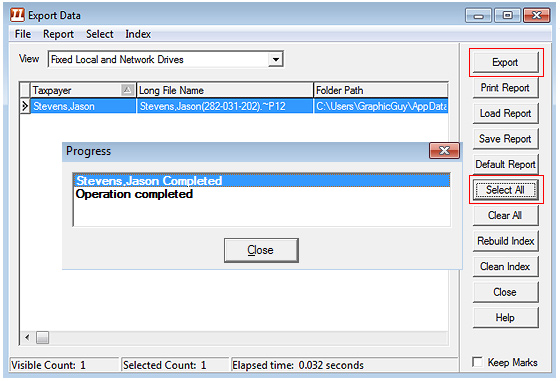
| STEP 5 |
|
 |
|
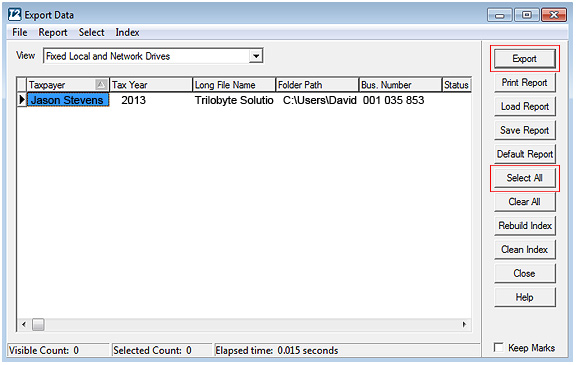
| To export all T1 files, click from right sidebar as shown above and click . |
|
Note: To select certain T1 files to export, hold key on keyboard while clicking on the files
from list and then click . |
|
| STEP 6 |
|
 |
|
| 1) Repeat to open up Import wizard in Client Track |
|
2) Click . A warning pop-up will appear, click to continue since template has been
saved from Step 2 above. |
|
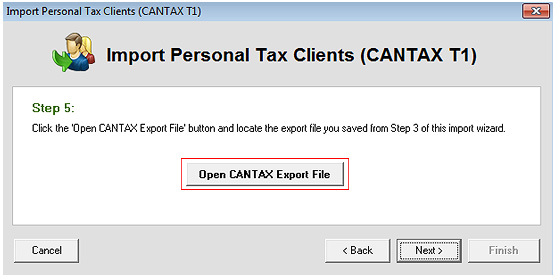
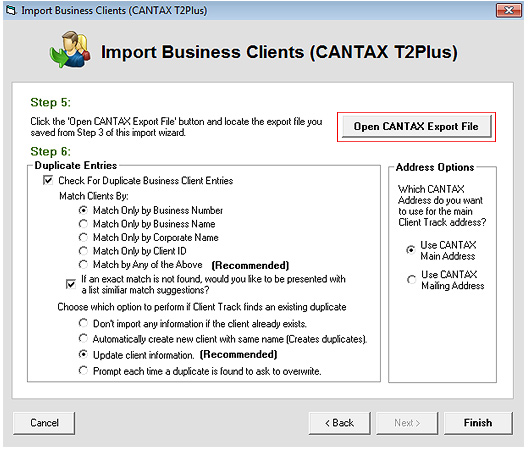
| 3) Keep clicking until you reach Step 5 of the Import wizard as shown above. |
|
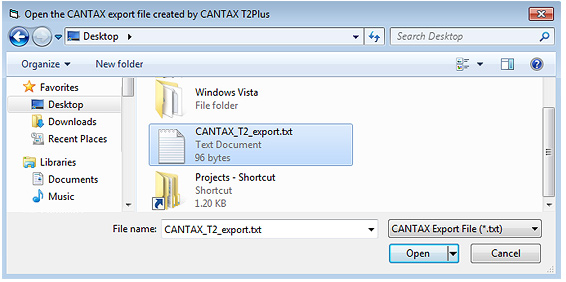
| 4) Click . |
|
 |
|
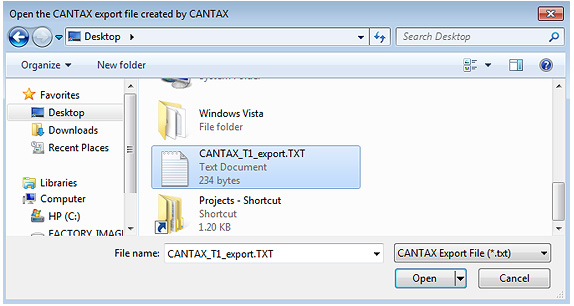
| 5) Find the T1 export text file that was saved from Step 5 and click . |
|
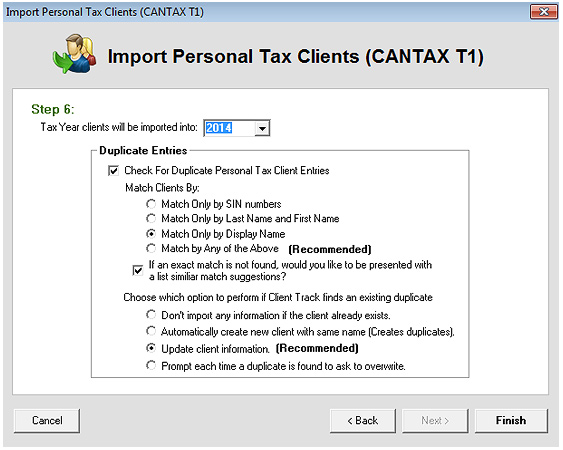
| STEP 7 |
|
 |
|
1) Check off and select type of match
and option for duplicates. |
|
| 2) Click to complete the import process. |
|
| Exporting Clients From CANTAX T2 |
|
| STEP 1 |
|
 |
|
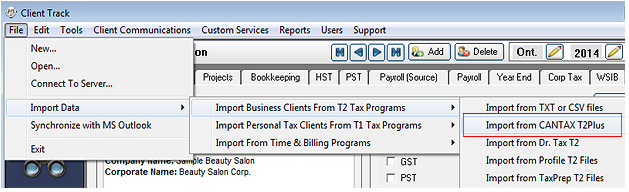
| From the main menu in Client Track, go to Import Data > ...From T2 Tax> . |
|
| STEP 2 |
|
 |
|
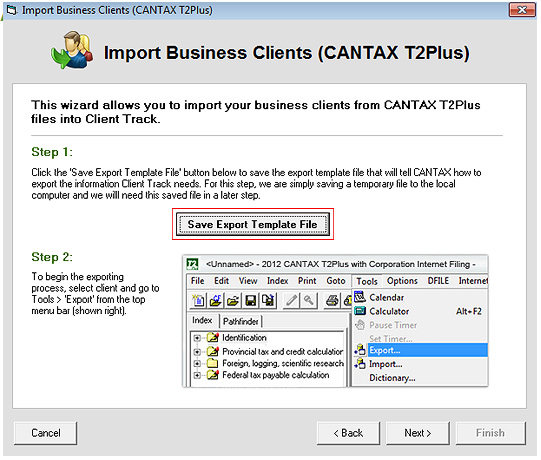
| 1) Click . |
|
 |
|
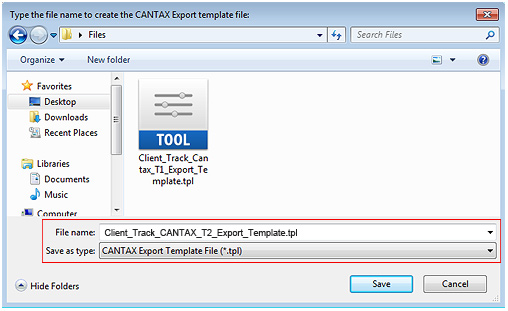
| 2) Select destination to save .tpl file to on your computer and click . |
|
| STEP 3 |
|
 |
|
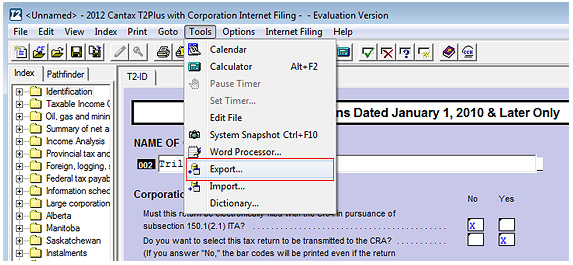
| Open up CANTAX T2Plus and click from the main menu. |
|
| STEP 4 |
|
 |
|
| 1) For 'Export template', click and find the saved .tpl file from Step 2 above. |
|
2) For 'Export filename', click . Select the destination to save file to and insert name of
export file and click . |
|
| 3) Under 'Output', check off . |
|
| STEP 5 |
|
 |
|
| To export all T2 files, click from right sidebar as shown above and click . |
|
Note: To select certain T2 files to export, hold key on keyboard while clicking on the files
from list and then click . |
|
| STEP 6 |
|
 |
|
| 1) Repeat to open up Import wizard in Client Track |
|
2) Click . A warning pop-up will appear, click to continue since template has been
saved from Step 2 above. |
|
| 3) Keep clicking until you reach Step 5 of the Import wizard as shown above. |
|
| 4) Click . |
|
 |
|
| 5) Find the T2 export text file that was saved from Step 5 and click . |
|
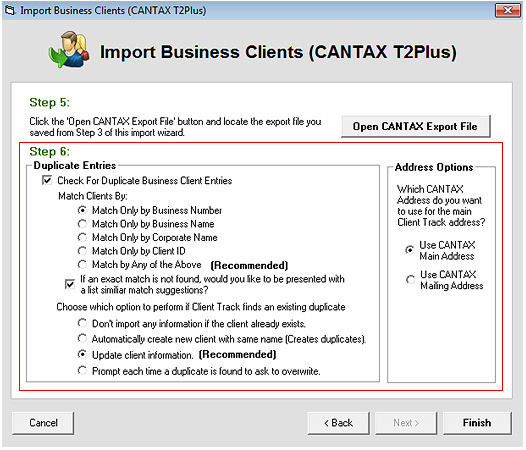
| STEP 7 |
|
 |
|
1) Check off and select type of match and
option for duplicates. |
|
| 2) Click to complete the import process. |
|