|
|
|
|
Step 1 |
|
|
|
|
|
 |
|
|
|
|
|
 |
|
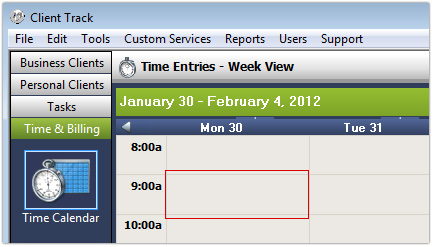
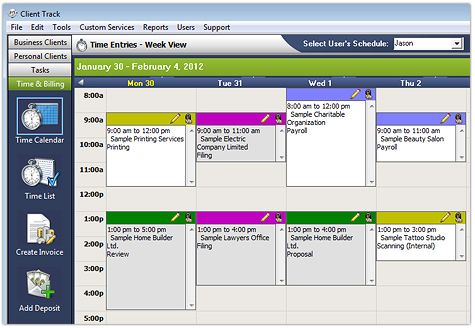
In Time & Billing, go to > Time Calendar |
|
|
|
|
|
|
|
Step 2 |
|
|
|
|
|
 |
|
|
|
|
|
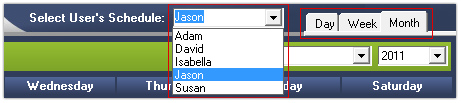
1) To view time entries of an user, select user from drop-down list.
2) To view time entries in a different calendar view, click one of the calendar view tabs
as shown below. |
|
|
|
|
|
 |
|
|
|
|
|
3) Double-click on an empty timeslot to create a time entry. |
|
|
|
|
|
Step 3 |
|
|
|
|
|
 |
|
|
|
|
|
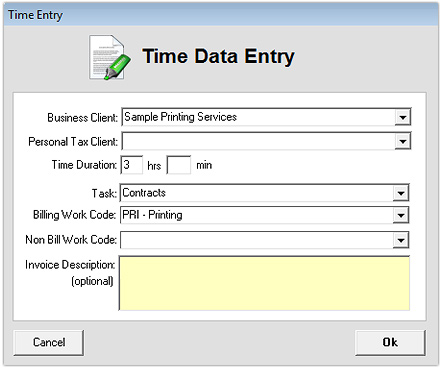
1) Select a business or personal tax client from drop-down list.
2) Insert time duration for entry and select task type, billing work code or non-billing
work code from drop-down lists as shown above.
3) Click Ok to add time entry to calendar. |
|
|
|
|
|
Note: The Time Data Entry window above is a simple version. The advanced
version can be activated by following Step 3 here. |
|
|
|
|
|
 |
|
|
|
|
|
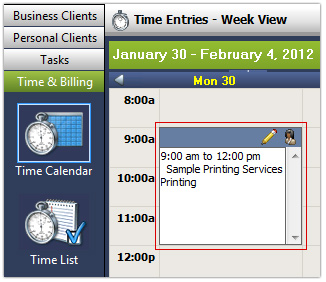
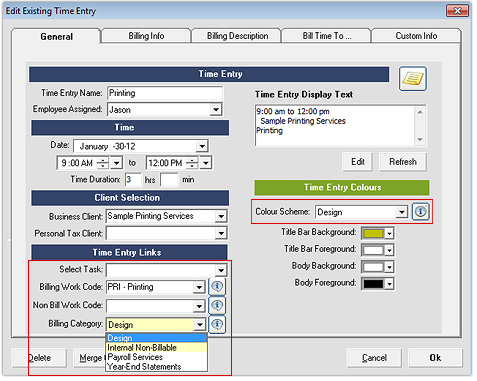
4) Double-click on the newly added time entry to change additional settings. |
|
|
|
|
|
Step 4 |
|
|
|
|
|
 |
|
|
|
|
|
1) Click the General tab.
2) Select type of billing category and color scheme from drop-down lists.
3) Click the Billing Info tab. |
|
|
|
|
|
 |
|
|
|
|
|
4) Select type of billing and rate as well as the tax code from drop-down lists
as shown above.
5) Go through the other 3 tabs to include additional information if needed.
6) Click Ok to save new changes for time entry. |
|
|
|
|
|
Step 5 |
|
|
|
|
|
 |
|
|
|
|
|
1) The revised time entry with new changes from Step 4 should appear on calendar. |
|
|
|
|
|
 |
|
|
|
|
|
2) Repeat Steps 2-4 to add more time entries to calendar as shown above. |
|

